How to Pay with USDT or USDC
Last Updated: November 3, 2026
You can buy EasyFaceSwap credits with USDT (Tether) or USDC (USD Coin), stablecoins worth about one US dollar each. This guide walks you through the whole payment. Once your coins are ready, it usually takes just a few minutes.
Before you start: you need USDT or USDC in a crypto wallet or on an exchange account, plus a little of the network’s own coin to pay the transfer fee.
1. Get your USDT or USDC ready
You can pay from either of these:
- A crypto wallet, such as Trust Wallet or MetaMask.
- A crypto exchange account, such as Binance, OKX or Coinbase. You can withdraw straight to the payment address, so you don’t need a separate wallet.
Don’t have USDT or USDC yet?
- Sign up on a crypto exchange and complete its identity verification.
- Buy USDT or USDC with a card, a bank transfer or the exchange’s P2P market.
- Pay straight from the exchange with a withdrawal (step 4 below), or move the coins to your own wallet first.
Network fee
Every blockchain transfer costs a small fee, paid in the network’s own coin rather than in USDT or USDC: ETH on Ethereum, Arbitrum, Base and Optimism, POL on Polygon, AVAX on Avalanche. A wallet needs a little of that coin. An exchange usually takes its withdrawal fee from your balance and shows it before you confirm.
2. Choose “Crypto & local payment” at checkout
- Sign in, open Pricing, choose a credit pack and click Buy Now.
- Checkout opens in a new tab. Select Crypto & local payment and click Pay.
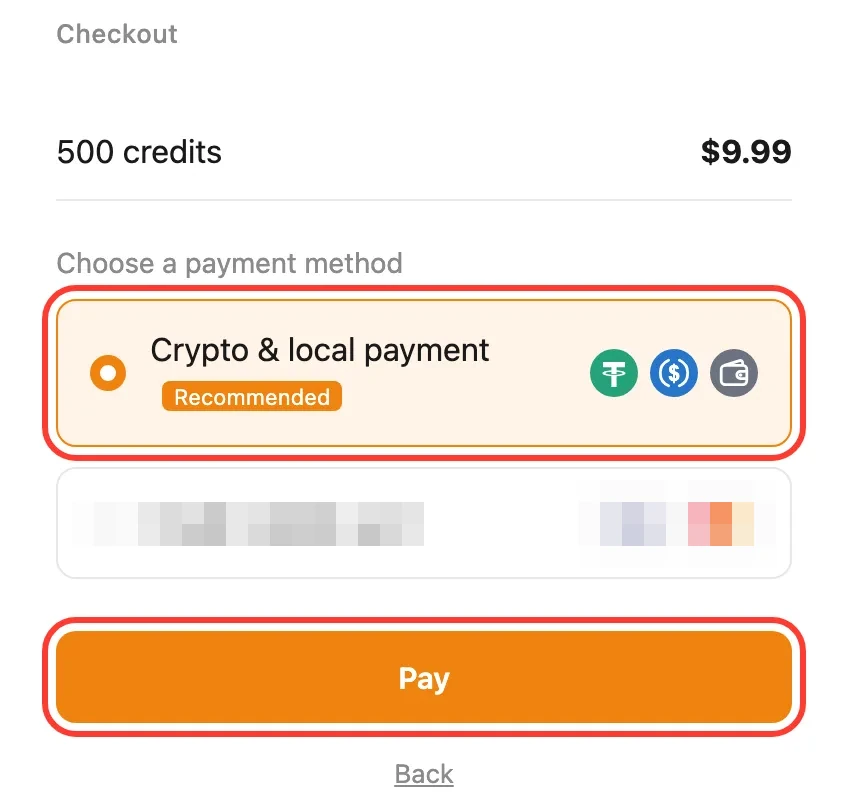
Don’t see this page? If Crypto & local payment is the only option available to you, checkout skips this page and goes straight to the payment page. Just continue with step 3.
3. Select USDT or USDC and a network
- On the payment page, open CRYPTO and select USDT or USDC. Crypto is offered in every region; with the region set to Global it is the only option.
- Under Select Network, pick Ethereum, Polygon, Arbitrum, Base, Optimism or Avalanche (C-Chain), whichever your wallet or exchange can send your coin on. Both coins use the same six networks. Polygon, Arbitrum, Base and Optimism usually cost far less in fees than Ethereum.
- Click Pay to see your payment details.
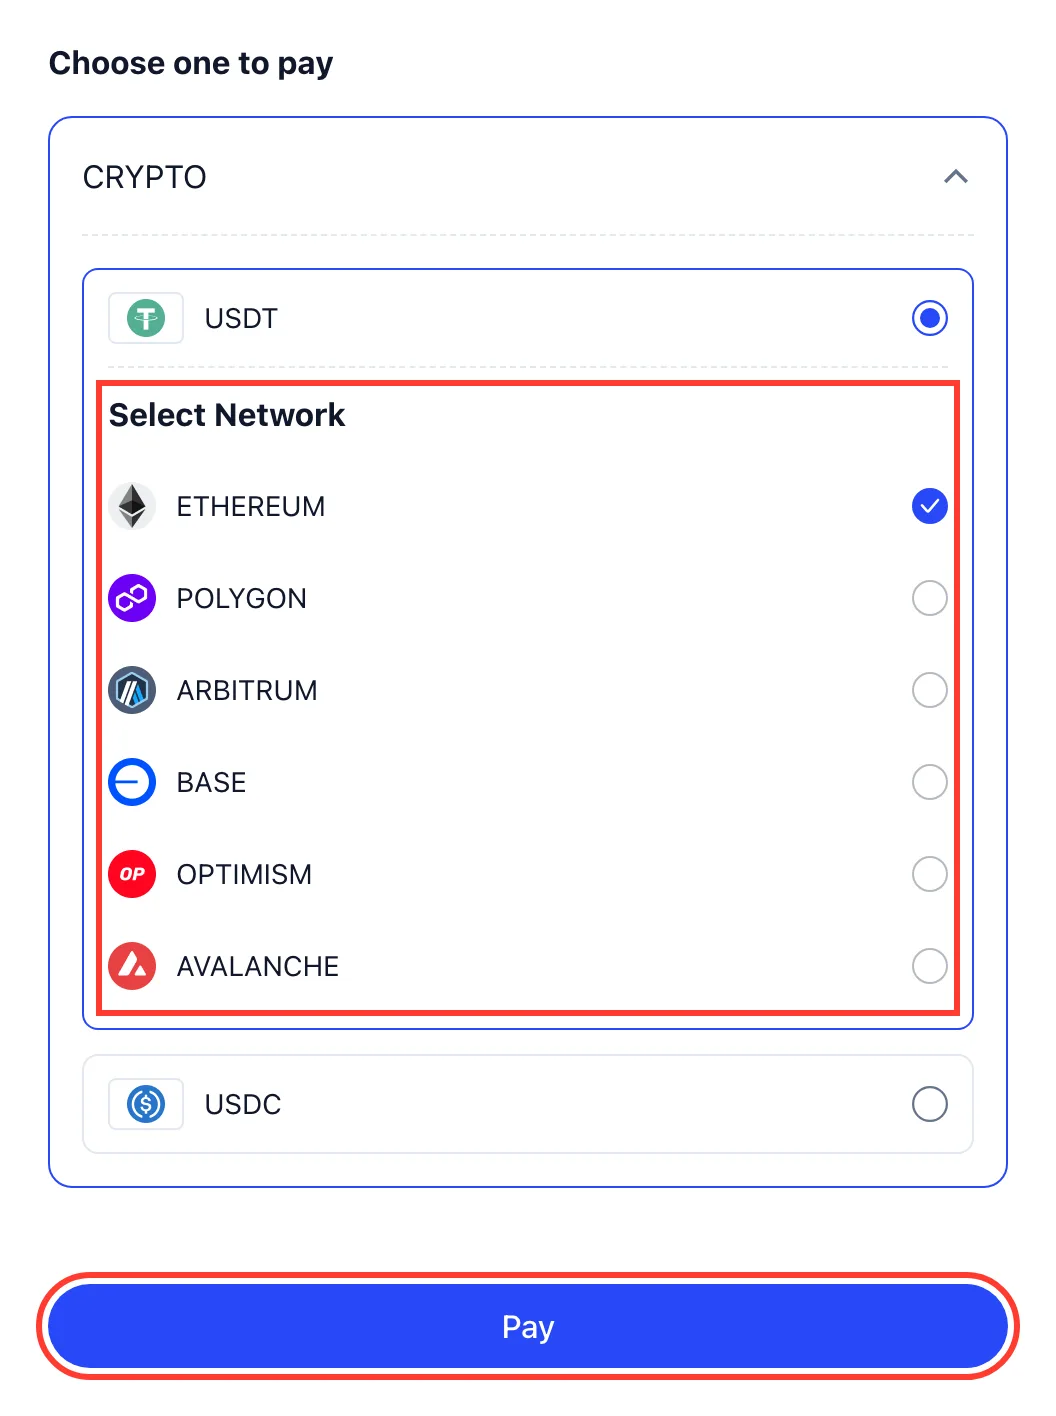
Send the coin you selected, on the same network. TRON (TRC20) and BNB Smart Chain (BEP20) are not supported, and many exchanges pick TRON by default, so change it before you withdraw. USDT sent to a USDC order (or the other way round), any other coin, or a transfer on any other network cannot be matched to your order and may be lost.
4. Send the exact amount
The page now shows the Amount to pay, the Payment address and a QR code, together with the time the order expires.
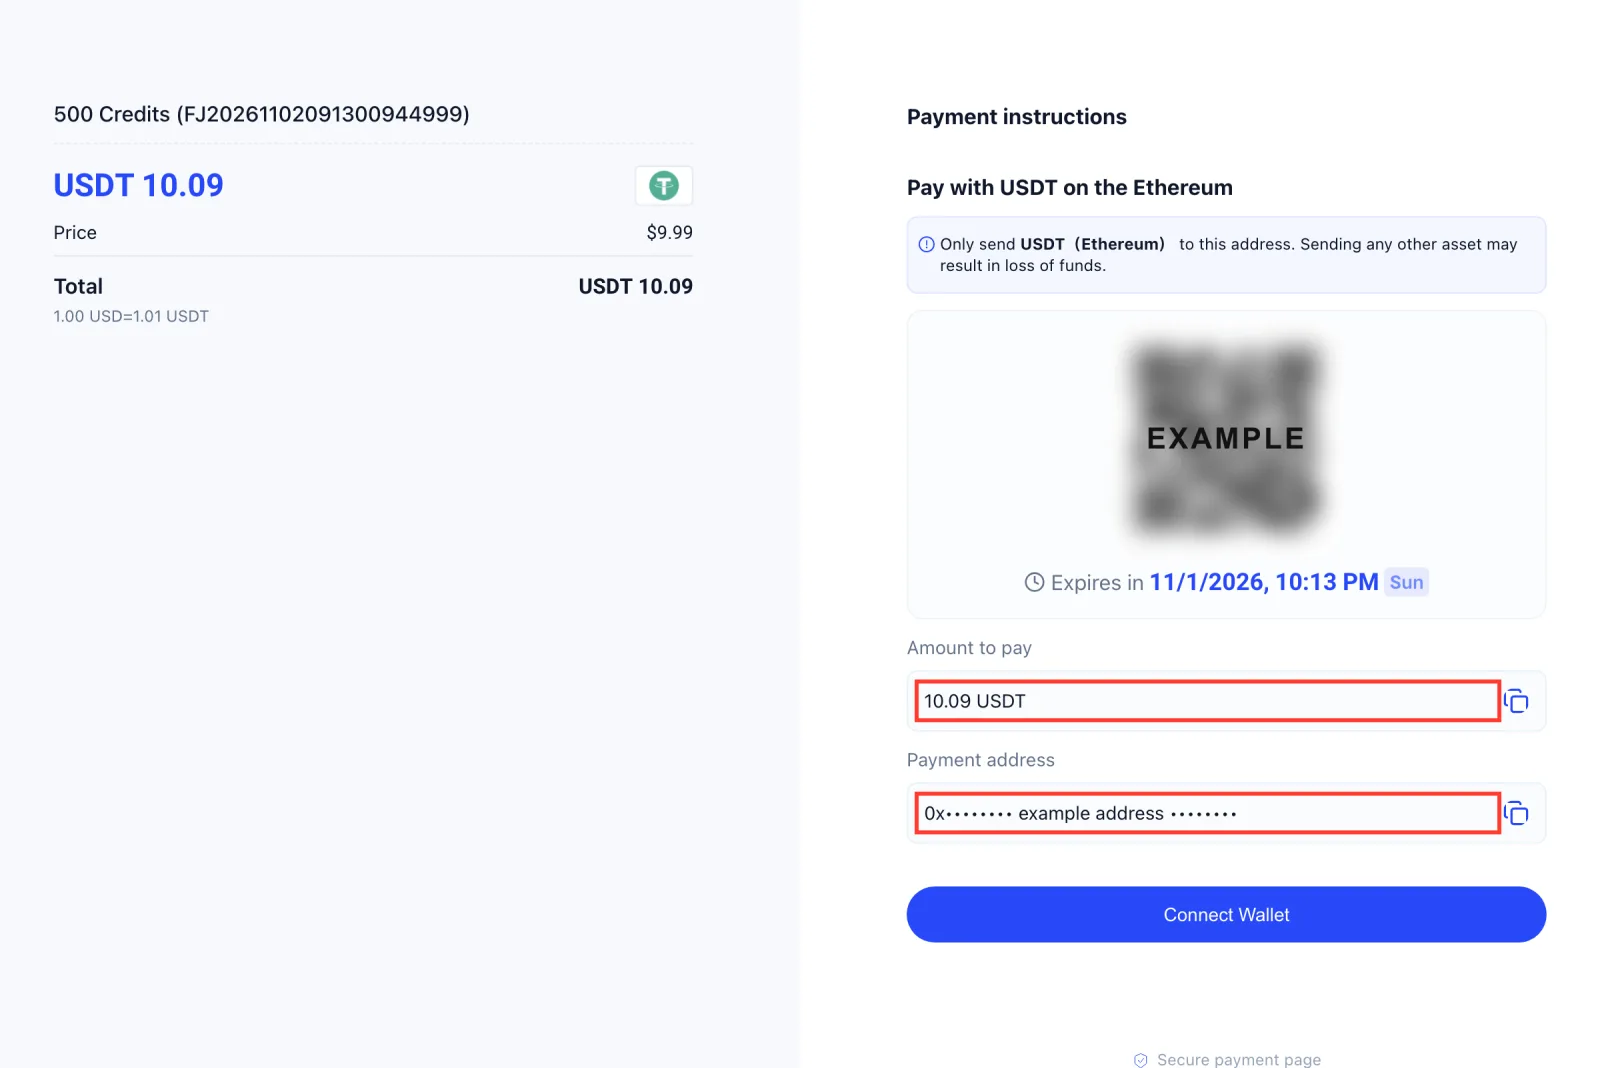
- Copy the Amount to pay with its copy button.
- Copy the Payment address the same way.
- In your wallet or exchange, open the coin you selected (USDT or USDC) and choose Send (wallet) or Withdraw (exchange).
- Select the same network, then paste the address and the amount.
- Check every detail and confirm the transfer. A mobile wallet can scan the QR code instead, and Connect Wallet works with browser wallets such as MetaMask.
Send exactly the amount shown, before the order expires. The amount is already converted at the current rate. If your exchange deducts its fee from the amount you enter, add the fee so the full amount arrives. Every order has its own address, so never reuse an old one.
5. Wait for confirmation
Once the network confirms your transfer, the payment page shows Payment Successful. Most transfers are confirmed within a few minutes; a busy network can take longer.
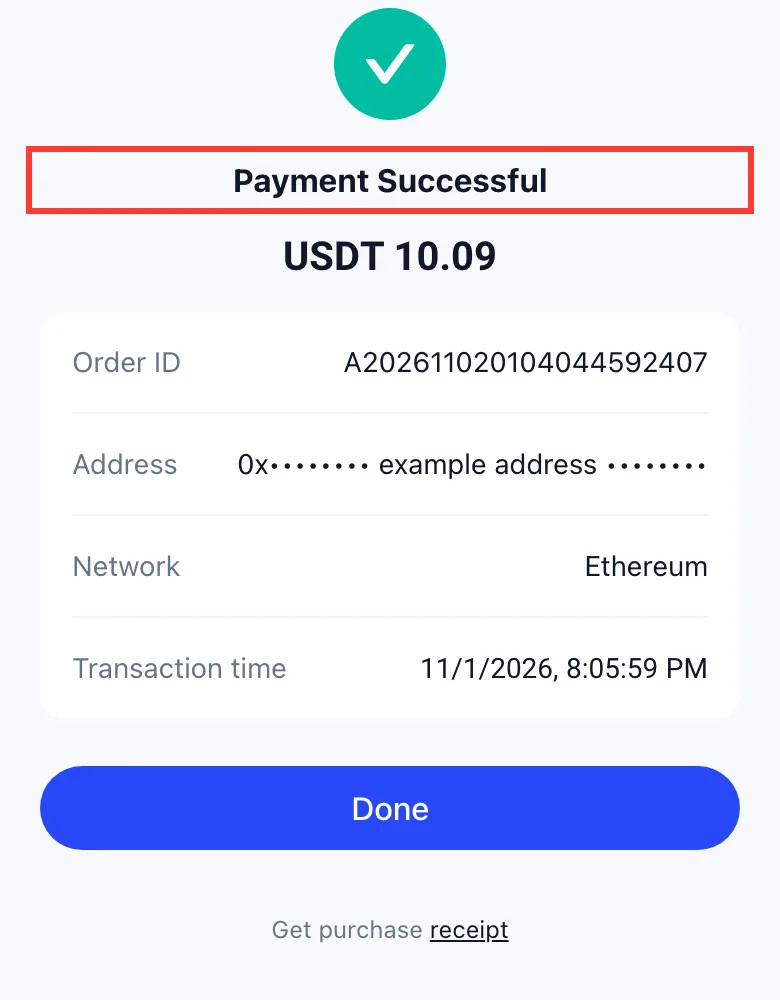
Your credits are added automatically. The EasyFaceSwap tab you bought from updates on its own, so there is no need to refresh.
6. Need help?
- No credits 30 minutes after paying? Email [email protected] with your order number (shown on the payment page, it starts with FJ) and the transaction hash (TxID) from your wallet or exchange.
- The order expired? Go back to Pricing and buy again to get a new address and amount. If you had already sent your coins, contact us with the TxID.
- Sent on the wrong network or a different coin? Contact us with the TxID right away. Funds sent on an unsupported network may not be recoverable.